Aging meat has been a necessary practice for thousands of years. Along the way, there have been plenty of methods developed. Some hunters need a method that is easy, yet effective; others want to go the extra mile. Today we will cover the majority of those methods and point you in the right direction if you want to try one out. Of course, 30 day dry-aged steak goes for a pretty penny in high-end restaurants, but if you don’t want to put that much effort into it, is there any difference in the taste?
Aging meat is a way to make the meat tender, improve flavor, and minimize some gamey-ness that can come from improperly processed meat. The process can vary; however, there are general guidelines to prevent harmful bacterial growth and create something that will taste better than any store bought steak.
Aging deer meat isn’t too hard to do, even for a beginner. If you pay attention to it and don’t forget about it for a while, it’s hard to screw it up too much. I have a little something for everyone in this article, but let’s start with the basics of why we age meat in the first place!
Why Does Deer Meat Need to be Aged?
Aging meat isn’t a stark requirement for consumption, but it does develop some flavor and improve on both great quality cuts and some otherwise less-than-ideal meat. It’s a skill to hone over the years after easily learning the basics, but it will be worth it once you taste it. Plus, aging can improve the taste and texture of your deer, especially if it’s an older deer.
After death, an animal’s body goes through chemical changes even while you drag it out of the woods. This starts immediately and has a few different stages that can make the actual butchering process more taxing if not timed right.
Within a few hours of dying, the deer’s tissue enters a state of rigor mortis (Latin for “stiffness in death”). This is due to a lack of oxygen helping proteins maintain muscle fibers. This lack of oxygen results in muscle contraction that then takes another 12 to 24 hours to resolve. The rigor mortis period is more of a signal that the aging process is going to start soon.
After rigor mortis resolves, the enzymatic processes begin to break down proteins in tissues. These are mostly connective tissues that are hard to chew and create that tough texture I’m sure we’ve all experienced at least once in our lives. By aging meat, we allow those natural enzymes to break down the meat over time, making it much more tender than it otherwise would be.
Prepping Your Deer Meat for Aging
The first step to prep your deer meat for aging is to clean and gut it. Out of all the work involved in hunting, this can be the hardest, and the most important. Regardless, the processing is something to accomplish with precision as early as possible. Rushing this step leads to messy cuts, spilled intestines, and possibly spoiled meat. Take your time to do it right, but get the meat cooled down as fast as possible.
For a little more in-depth discussion of why, how, and when to gut and clean your deer for the best-tasting meat, read our article on how long you can wait to gut a deer. I’ll hit some of the high points below.
To start off on the right foot, gut your deer as soon as reasonably possible; especially if you have the opportunity to field dress your deer right after recovering it. The longer you wait to dress and gut your deer, the more opportunity there is for organ matter to spill, and the more time bacteria have to grow. If you have ever had super “gamey” meat, the most common reason is that they left it out too long.
If your meat is gamey and you aren’t sure why, check out my other article titled “Why Does Deer Meat Taste Gamey?” where I go through all of the things you may be doing wrong.
Low temperature is your friend. If you’re not harvesting in some seriously northern-style temps, get your meat into a cooler as soon as you can. This will prevent any possible spoilage, even if you can’t quarter the animal immediately. Generally, the warmer the temperature, the shorter time you have to process safely. For a fairly accurate estimate of how much time you have to gut a deer given the temperature, read the table in this article.
Did You Know I Had a Newsletter?! 📬
I do! I send out a weekly email that talks all about deer hunting and is a bit more personal than a regular article. If you sign up right now, I will even send you the first chapter of my Ebook “The Hunters Guide to Scent Control” for free! What is there to lose? 🙂
How Do You Age Deer Meat?
Now the fun begins. Once your deer has been recovered, dressed, and quartered, all you have to do is decide how you want to age it. A very important step is to consider the temperature you can keep your meat. If your deer is in a state of rigor mortis when you throw it in a freezer, your meat will stay just as tough as that chemical reaction makes it.
Cool is the goal, not frozen; between 32 and 40 degrees is generally a good range. If you’re hanging your deer outside and in an area with below-freezing temperatures at night and above-freezing (but still cool) temperatures in the daytime, this isn’t a great combination either. Your meat isn’t aging if it’s frozen and experiencing continual freeze-thaw cycles.
Different Meat Aging Methods
There are several meat aging methods. They all serve the overall purpose of enabling the enzymes to begin breaking down tough meat tissues and develop a better taste. Which method is the best honestly depends on who you ask, and how much you are willing to spend. Walk-in coolers are awesome for aging deer, but some of the best meat I have ever eaten was aged in a cooler.
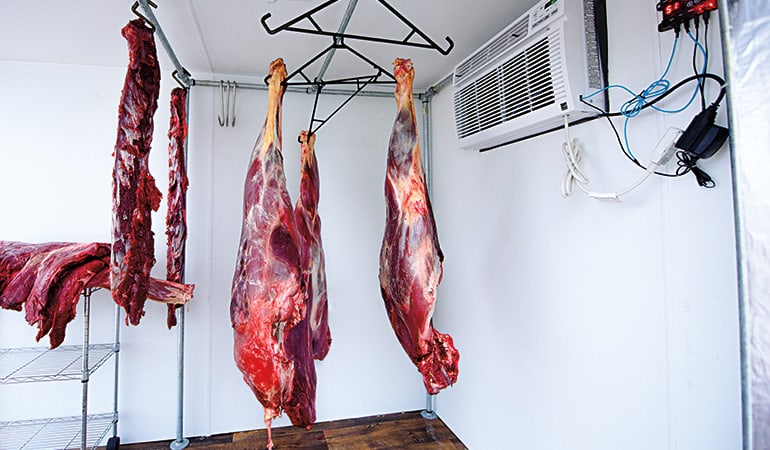
Dry Aging Venison
Dry aging is accomplished either outdoors, in a refrigerator, in a walk-in cooler, or in cold storage. This leads to a layer of dried meat that needs to be trimmed before cooking but can be mitigated by dry aging with the skin on. Using a walk-in cooler or cold storage regulates the fluctuation of the temperature. You will have better overall control of the entire process instead of reacting to changing outside temperatures. This is usually the barrier that keeps people from dry aging because these coolers can be expensive.
If dry aging a whole deer, hang it by the gambrels and leave the skin on for maximum moisture retention. You can do the same thing if you are quartering the deer and don’t mind losing the hide.
If your meat is outside, keep an eye on the temperature but don’t get crazy. If the temps get to 30 right before the sun comes up in the morning, your meat probably won’t freeze. If you press on it and it isn’t hard it isn’t frozen yet. Additionally, if the temps are getting warmer in the afternoon and getting over 40 in the sun, as long as the meat is in the shade it should hold a lower temperature.
Prolonged exposure to temperatures above 40 and below 30 becomes a problem but momentary fluctuations should not be a concern. The core temperature of the meat will not change as fast as the outside air. You can also wrap it in cheesecloth to protect the exposed surfaces from flies.
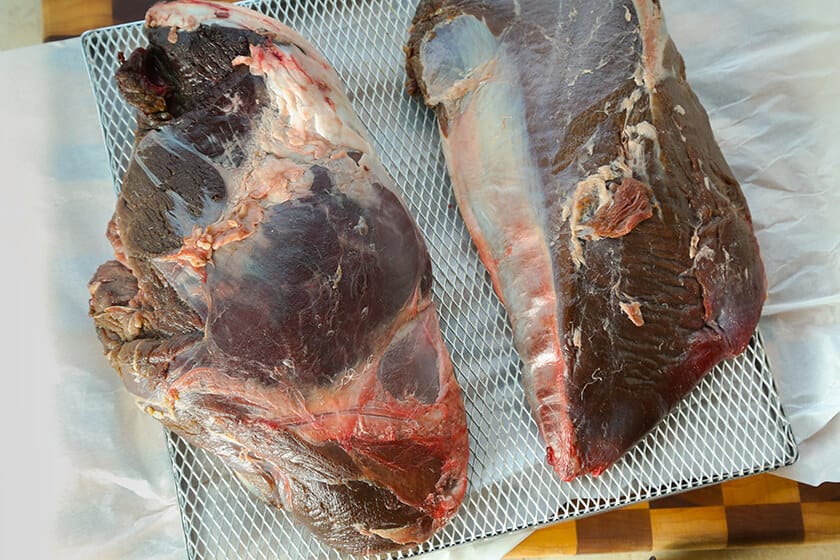
In fact, in places like Alaska, it is easy to find meat hanging out when the temperature is in the low 50s. After the skinned meat has developed a shell (hardened outer layer of tissue) if it is stored out of the sun you have a few days before it will go bad. There is a fine line, but the point is if your meat is outside and it gets to 42 you don’t need to throw out all your meat.
After aging for 10 to 30 days, the hardened outer layer will need to be removed. This is relatively easy with a sharp knife and a steady hand. Deer meat can be dry aged with the skin on but as the meat ages, the skin becomes much harder to remove. A job that usually takes 15 minutes on a fresh kill can take hours on an animal that has been hanging for a few weeks.
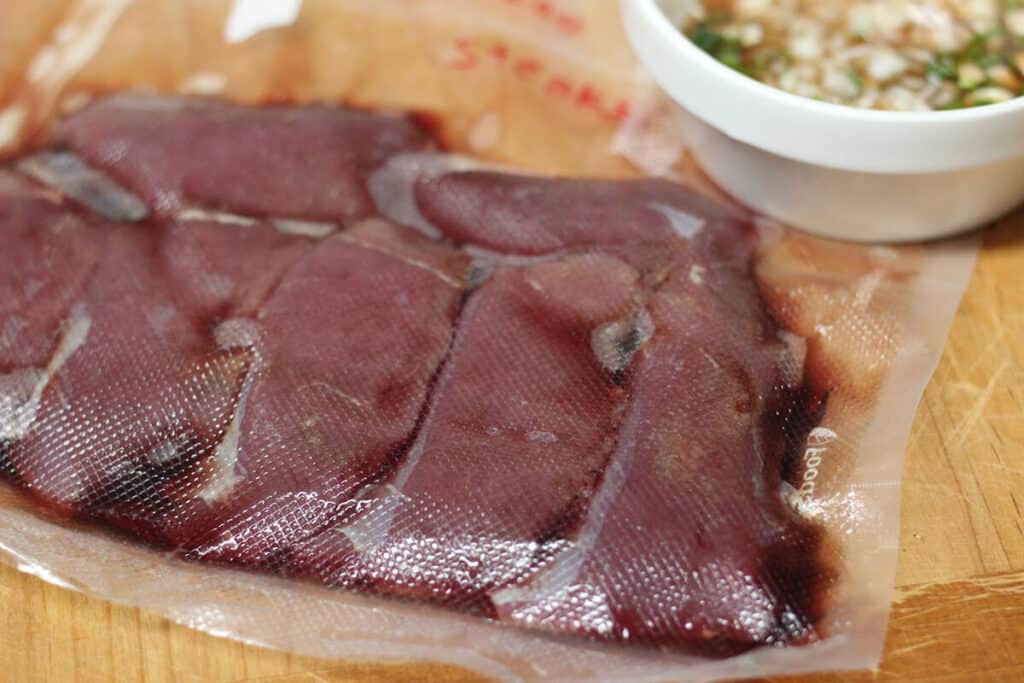
Wet Aging Venison
Wet aging is accomplished when muscle groups are vacuum sealed in plastic bags and placed in a refrigerator. The vacuum seal removes the air and limits bacterial growth, and within 7 to 28 days, the enzymes have broken the meat down enough to have some super tender cuts. Around 14 days seems to be the optimal time to wet age venison.
The bags do not necessarily have to be in a refrigerator either. If you have access to a walk-in cooler or cold storage with temps in the high 30s, it’s a great option. Be sure to remove all traces of hair or organic matter before sealing the meat in a bag. This will limit the contamination that will lead to a gamey taste.
The problem I have with wet aging is that you keep all the meat’s juices in there with it. If your goal is to make good tasting meat that most people couldn’t tell wasn’t beef, then you are not going to be happy with wet aging. Yes, it will age the meat and it will be more tender, but it will always have that gamey taste because you have to keep those liquids inside.
If your meat is gamey and you aren’t sure why, check out my other article titled “Why Does Deer Meat Taste Gamey?” where I go through all of the things you may be doing wrong.
Your best bet is to let the meat sit out for about 24 hours on a cooling rack inside the fridge before you vacuum seal it. That way a lot of the juices will come out, and you can seal it with less blood in it. Another thing you can do to reduce that gamey flavor is to reopen the sealed meat after 7 days, pat it dry and reseal it for the remainder of the aging period in a new bag.
One good thing about wet aging is that you can actually do it with frozen meat. If you froze your cuts in vacuum sealed bags after butchering, you can thaw them out in the fridge and leave them there for a couple of weeks (still vacuum sealed). This will age them the same way as non-frozen meat, but I am sure that you will be able to taste the difference. Although if you have meat that was accidentally frozen, or you didn’t have time to age it, wet aging after the fact will definitely improve the tenderness.
If you have a good vacuum sealer, wet aging works fairly well, and it is easy to do. Although I don’t think it is the best way to age deer meat. I like to keep my meat as dry as possible and get those juices out, which removes that gamey taste that your wife probably doesn’t like. The way I do that might be a little counterintuitive, but it is with a simple cooler and ice!
Cooler Aging Venison
If you do it right, cooler aging deer meat will make it taste as good as any beef you could buy. Although there is one ginormous mistake that I see most people make when they cooler age deer. They wrap the meat up in plastic bags before putting it on ice. This is not wet aging. We want as much liquid as possible to get out of the meat. If you are just wrapping the meat in plastic bags, some water is going to get in and promote bacteria growth. If you are vacuum sealing the meat, you are not cooler aging, you are just wet aging in a cooler.
The second glaring mistake I see is people letting the meat soak in the melted ice water. If you do that, your meat may as well be a playground for bacteria. That water has to drain out. So, as I go into my method, remember, no plastic bags, and don’t soak your meat.
If you live in the South like I do, then you have probably shot quite a few deer when it was fairly hot out. Anything over 40 degrees is going to make your meat spoil. During the opening day of bow season here in north Georgia it can be over 90 degrees. If you shoot a deer when it’s over 40, you need to cool it down ASAP. Bringing a cooler along is the easiest way to do that. Of course, you will need to be confident enough to buy a few bags of ice before you kill one. I only do that if I am hunting out of state, otherwise, I can pick up some local ice pretty quick if I am hunting around the house.
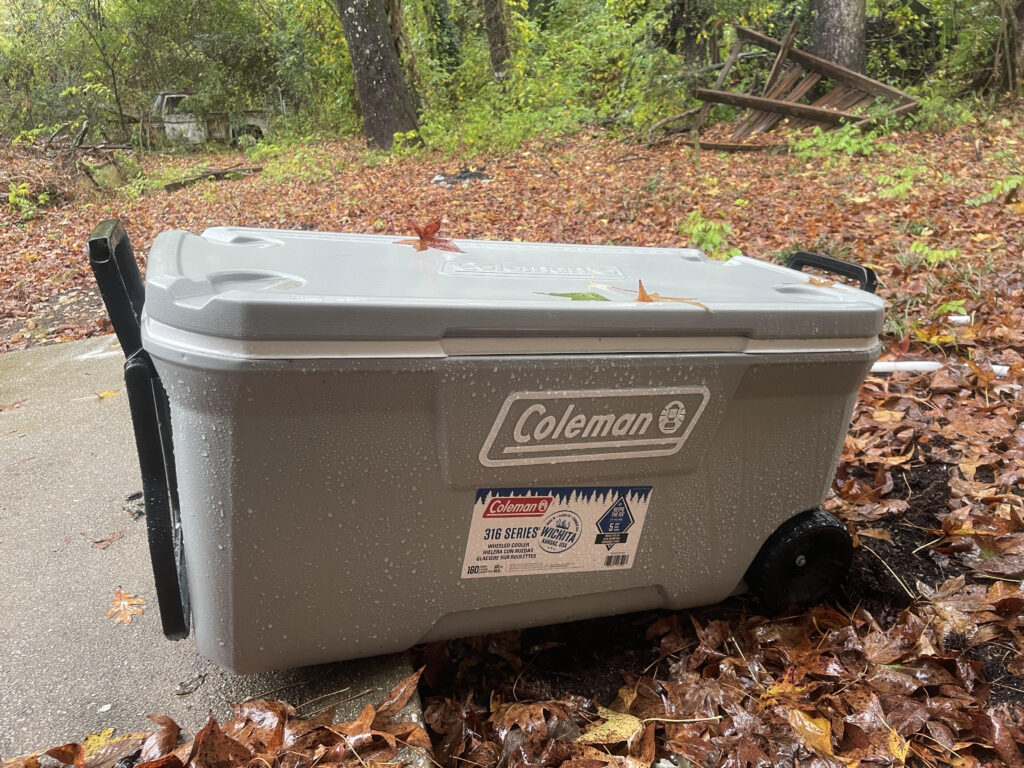
Just like any other method, you need to quarter your deer and get your backstraps and tenderloins out. Then you lay down a layer of ice in the cooler, and start layering quarters on top. Try to fill a layer of the cooler with meat, and then put more ice over it and start a new layer. Ice, meat, ice, meat, ice. When you first put that deer in the cooler it is going to be hot, so go ahead and open that drain plug on the cooler, because there will be water pooling up. You want to avoid letting your meat sit in that water at all costs. if that water is allowed to drain, your meat will be nearly dry to the touch, it shouldn’t be wet at all.
When you get home or back to your camp, you want to prop your cooler up on the side that doesn’t have the drain plug. Then your drain plug will be at the lowest point, therefore draining the water. You should never have water sitting in the cooler. If you have a long drive back home, do the same thing with the cooler in the bed of your truck. Plus, a near constant stream of bloody water is a good way to keep people from riding your tailgate on the way home.
That is more or less it! You just need to check on the ice every day or every other day and when it starts to get low, add more ice. if you are up to it, you can take the meat out and relayer ice between the meat. Although if you forget about it for a while, your meat will spoil.
You can cooler age deer meat for anywhere between 3 and 14 days. From my experience, 7 days seems to be the sweet spot, and paying for the extra ice to get to 14 days doesn’t seem to be worth it. Once it is aged enough for you, start butchering and freezing it in vacuum sealed bags.
Buttermilk Aging Venison
Buttermilk contains lactic acid and calcium, which help break down connective tissue even further when used in combination with the general aging process. This isn’t the best way to tenderize thick cuts of meat, as marinades have a hard time penetrating past the surface, but the meat will continue its own aging process even if the buttermilk does not completely penetrate the tissues.
The biggest historical reason for this type of aging was to remove the gamey taste. The milk binds itself to the meat and significantly masks the poor flavor. Using milk removes much of the wild flavor and makes the meat a lighter color.
This method does not take as long, some people do it overnight, and some as long as a week. After a week you risk the buttermilk spoiling which may create problems with your meat aging process. Make sure the meat is completely submerged in a sealed container for uniform flavor.
Personally, I don’t like the taste this method produces. Buttermilk itself is more expensive than the other methods I listed here, and I think you can get a much better product with simpler methods.
Butter Aging Venison
Butter aging isn’t a common practice even with beef. Although some people swear by butter aging for cuts of steak, especially if you like to sear them with a few spoonfuls anyway for extra flavor. You soften (almost melt) enough butter to coat a cut of meat with a half-inch or so “crust” of butter and place this in the refrigerator.
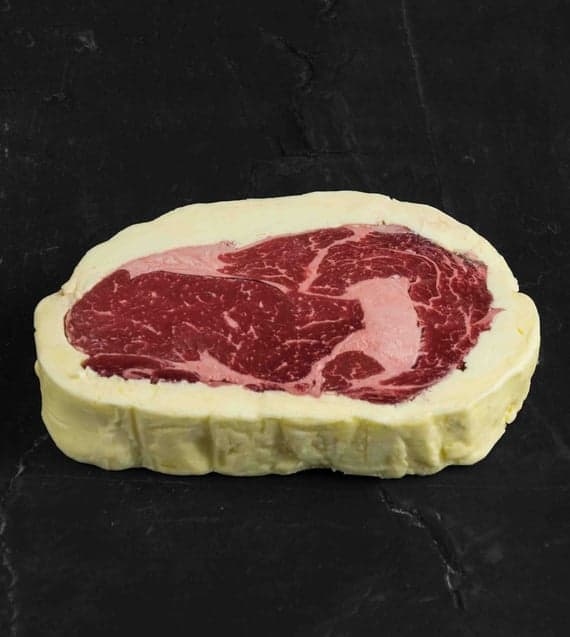
The crust of butter keeps the meat from drying out through its aging process. It works very similarly to wet aging. No meat shell or crust must be removed after the completion of the aging process. Additionally, the meat seems to soak up the buttery flavor. All you have to do is slice off however thick you want your venison steak and sear it like you typically would.
Make sure to cover the meat pretty evenly with about ½ inch of butter and then let it age for up to two months for a juicy and buttery steak or roast. I haven’t tried this method just yet, and I am not sure I plan to either, but some guys love it so I thought I would include it for the curious cooks out there.
Wrapping Up The Aging Debate
Aging meat promotes tenderness and flavor. When you do it correctly your meat is going to come out more tender and with a better flavor. Watch the temperatures to make sure the meat is between 32-40 degrees to prevent bacterial growth or the halting of the aging process. You don’t want to freeze the meat, but you also don’t want it to get too hot.
There are plenty of methods for aging deer meat. Dry aging is extremely popular and is preferred if you have a refrigerator or walk-in cooler big enough. Wet aging is easy, but may lead to a more gamey tasting meat. I prefer cooler aging because it is so easy, and it works very well. There are plenty of other off-the-wall methods to try out too, but I would stick to the three I mentioned here. If you use a method that I didn’t list, send me an email and tell me about it!
Thank you for reading my article! I hope you enjoyed it, and if you have any questions or feedback, please send me an email at Patrick.Long@omegaoutdoors.net. If you want to learn more about me or Omega Outdoors, visit my About Page. Otherwise, I hope you have a great day, and check out some of my other articles while you’re here!
Aging Deer Meat FAQs
There are a few common aging questions that hunters have, so I thought I would make a section hitting those high points and answering those questions as quickly and effectively as I can. let’s get started.
Can You Age Deer Meat After It Has Been Frozen?
You cannot age meat in a freezer, but you can thaw out frozen meat and age it. If the meat is frozen in a vacuum sealed bag, you can place it in the refrigerator and wet age it for up to 14 days after it thaws. If your meat wasn’t vacuum sealed and is dry or freezer burnt, aging it will not work.
How Long Should You Age Deer Meat?
Generally, you can age deer meat for 3 to 28 days. The optimal aging period for dry aging, wet aging, and cooler aging, is 21, 14, and 7 days respectively. The max aging period is likewise 90, 28, and 14 days. All aging methods should be used in a controlled 32 to 40-degree environment.
What’s the Best Temperature to Age Deer Meat?
The best temperature to age deer meat is between 32 and 40 degrees Fahrenheit. If you can set your temperature, 35 degrees is ideal. You don’t want the meat to freeze, that will stop the aging process. Alternatively, temperatures over 40 will promote bacterial growth, ruining the meat over time.
Sister Post | How Long Does Deer Meat Last in the Freezer?
A sister post is another post that I have written that follows along with the same topic as the one you just read. After reading this article, you will probably like this next one even more! Here is a little teaser…
During the fall, hunters always want to “fill the freezer”. That’s great, but how long can we actually store wild game in a freezer?…Keep Reading
Before the Freezer
Before you butcher and freeze your deer, you need to take care of it properly. If your deer meat has ever tasted “gamey”, it is likely because of poor preparation before cooking…Keep Reading
How to Properly Store Deer Meat in the Freezer
Once you have your aged meat butchered the way you like it, it is time to freeze. The first thing you are going to need is…Keep Reading