If you’ve made the transition over to cellular cameras, the first thing you will notice is how expensive they are. So when SpyPoint came out with a camera that had fairly good specs and that costs less than $120, it got plenty of people’s attention. Now the SpyPoint Flex is one of the more popular cameras on the market. Is it worth all the hype? A $120 camera isn’t top of the line, but these little cameras certainly get the job done.
Although if you plan on picking up one, or maybe more than one, you should figure out what you are getting into first. All and all, the SpyPoint Flex is a rock solid camera. It has great image quality, plenty of storage, fairly good battery life, and the cellular plans are not that bad either. The camera and app are super easy to use, and it is one of the few cameras that give you some free cellular images every month.
That’s great, but that is all the stuff that you can read in a basic description from SpyPoint themselves, what is the nitty-gritty that they won’t tell you? Well, after using the Flex all season last year, let’s go over what I found out.
First, here are some quick links to each section of this article so you can find what you are looking for a little easier if you have specific questions.
- SpyPoint Flex Camera Specs
- How the SpyPoint Flex Performed
- Setting Up Your SpyPoint Flex Camera
- Choosing Your Cellular Plan
- The SpyPoint App & Camera Settings
- Picture Storage
- The Only Time I Had an Issue
- The SpyPoint Insiders Club
- Would I Buy It Again?
TLDR; Is It Any Good!?
The SpyPoint Flex trail cameras are great for the money. They hold up well in the weather, and take great pictures and 1080p video with their 36 megapixel camera. They are extremely easy to set up, and the accompanying app is not hard to use at all. Flex cameras work with any cell carrier, and their support team is very helpful if you end up needing to call. Each camera needs its own cell plan, but they are moderately priced, with my favorite plan being the 1000 image per month plan for $10. After using the SpyPoint Flex all last season, I plan on buying a few more for this year, and if you’re in the market, I suggest you do the same. You can pick up the newest model on Amazon and get one day shipping.
SpyPoint Flex Camera Specs
The specifications on this camera are actually what made me buy it. I was standing in the aisle of my local Sportsmans Warehouse with a Tactacam Revel X in my hand when I saw the SpyPoint Flex. I had actually done some research on the Revel X beforehand and pretty much had my mind made up. What changed it was the fact that the SpyPoint Flex was around the same price, and had a much better camera at 33 megapixels compared to the Revel X at 16 megapixels. The more comparing I did, the more I realized that the Flex was a steal at that price.
| Camera Quality | 33/36 Megapixels (Version Dependent) |
| Video Quality | 1080p |
| Video Length | 15 Seconds |
| Cellular Carrier | Dual Sim / Any Carrier |
| Detection Range | 100 Feet |
| Trigger Speed | 0.3 Seconds |
| SD Card Size | 2 – 32 Gb |
| GPS Enabled | Yes |
| LED Flash | Low-Glow |
A 33 Megapixel camera is pretty good in the trail camera world, of course, it’s not the best, but it beats most cameras in this price range. For the settings that I chose, this made my images 960 x 540 pixels, and they were around 100 kb large on average. That’s a good definition, without being overly large and filling up all of your storage with a couple hundred pictures. At 32 Gigs, that’s 320,000 images!
The detection range is great too. My camera was picking up life much farther away than I thought it would, and that helped me catch a few more deer than I was expecting to. Although that long range did throw a few false triggers every now and again thanks to the wind and leaves, but it wasn’t a big deal.
The video capture is also pretty good, recording at 1080p. Your videos are 15 seconds long, which is plenty of time to see what you need to see. You can also adjust the trigger delay so you can start another video right after the first one if you want.
Personally, I used the multi-shot image capture setting the most. It takes three pictures at a time, and gives you a lot of information about what passed by, without creating a big video. Videos are also more expensive in the cellular plan, so multi-shot was the cheaper option as well. Although, if you want to get down to it, I used multi-shot because I was set up on a pinch point that had a lot of deer passing through pretty quickly. The video option would be better for a scrape or bait pile.
If you haven’t tried hunting funnels or pinch points before, they are likely the best place to hunt during the rut, and I wrote an entire article about it that tells you everything you need to know, check it out here.
How the SpyPoint Flex Performed
Before I get into the details of how to set up this camera, and all the settings you can play around with, I thought I would just be frank and tell you how it held up throughout the season. To sum it up in a few words: the SpyPoint Flex is an awesome camera for the price. I would say it is better than most of the cameras in its class, and it punches up into other price ranges too.
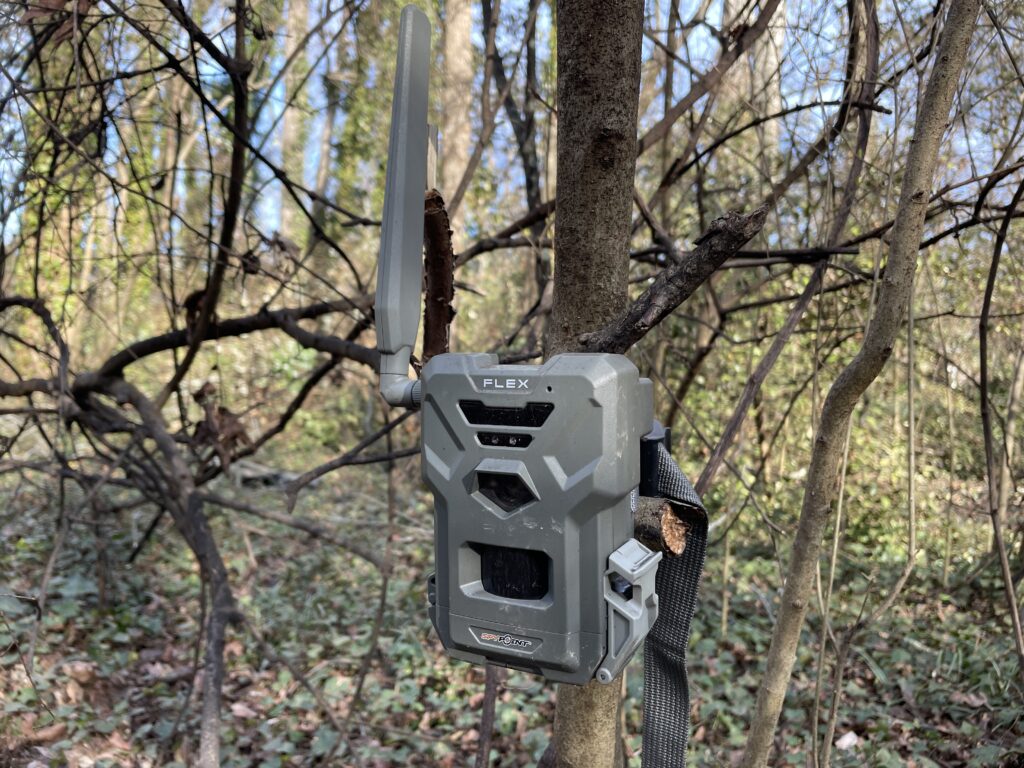
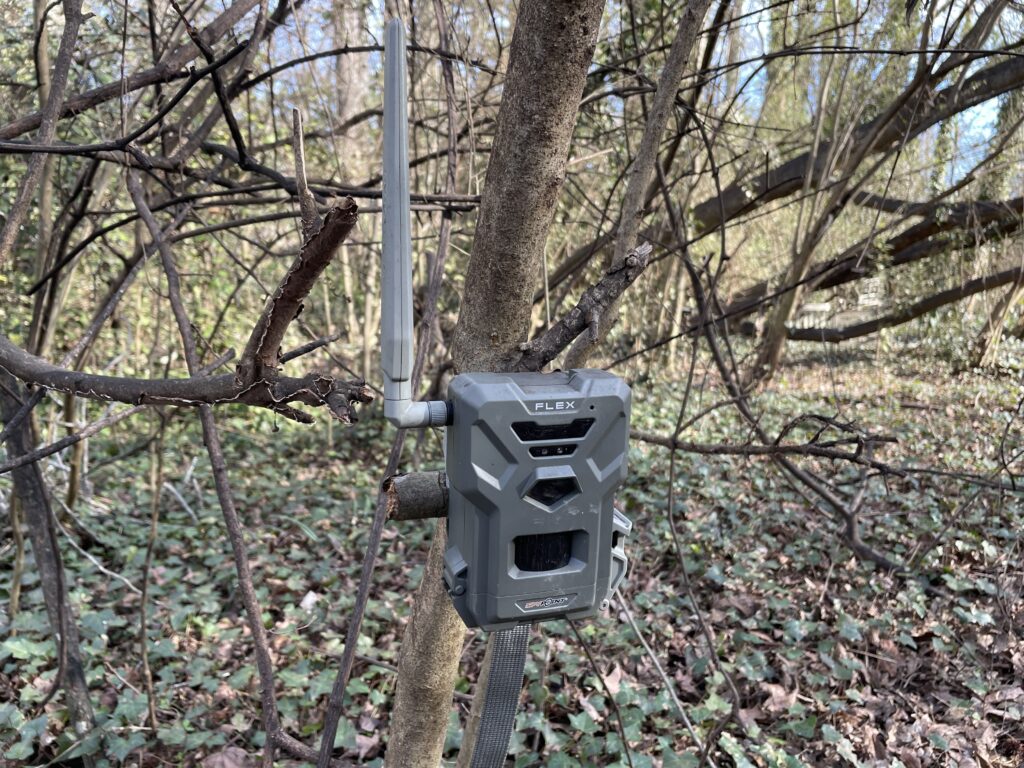
For starters, I left this camera out all season, only checking on it a couple of times to change the batteries. I had no issues with weather or water damage, and we had plenty of storms. It also handled temperatures between 30 and 90 degrees without a care. Weather is what kills a lot of cameras, but this camera is too new to know how it holds up over multiple seasons.
If a company wants to make a good product, they need to make it easy to use. The Flex is super easy to set up, and the app makes it easy to adjust its settings and look at your pictures. Some of these apps are total garbage, and while I’m not saying the SpyPoint app is perfect, I didn’t have any issues with it.
The one thing that I would say separates this camera from a top tier camera are the false triggers. My neck of the woods tends to be fairly windy, and I had to move this camera around a little so it didn’t pick up as much movement when the leaves started moving. Those false triggers fill up your image count for the month, which is just a waste of money.
If you use the three image multi-shot like I did, you lose images three times faster. Before I got the settings and camera placement dialed in, I would say 60% of my pictures were of nothing but limbs. Afterwards, I would estimate that 20% of my images were from the wind. Every camera has false triggers though.
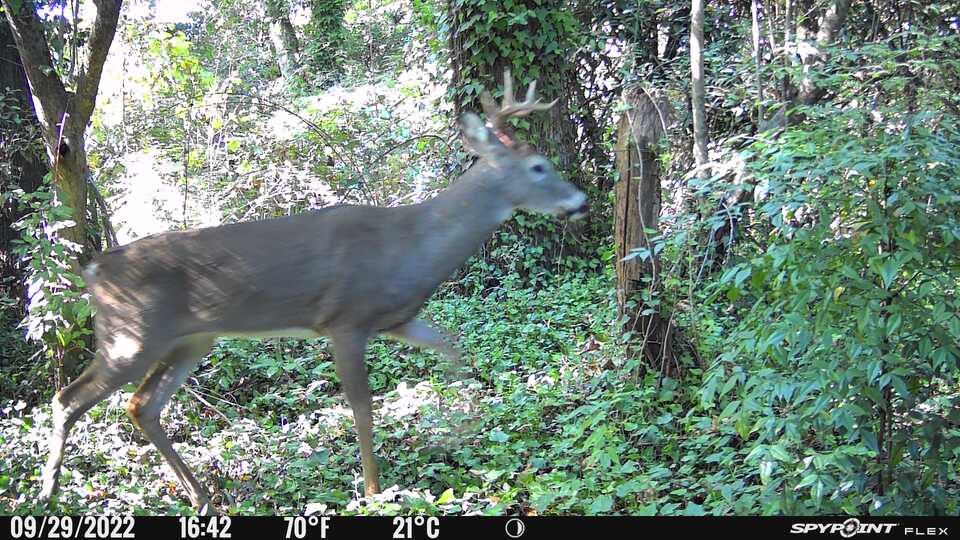
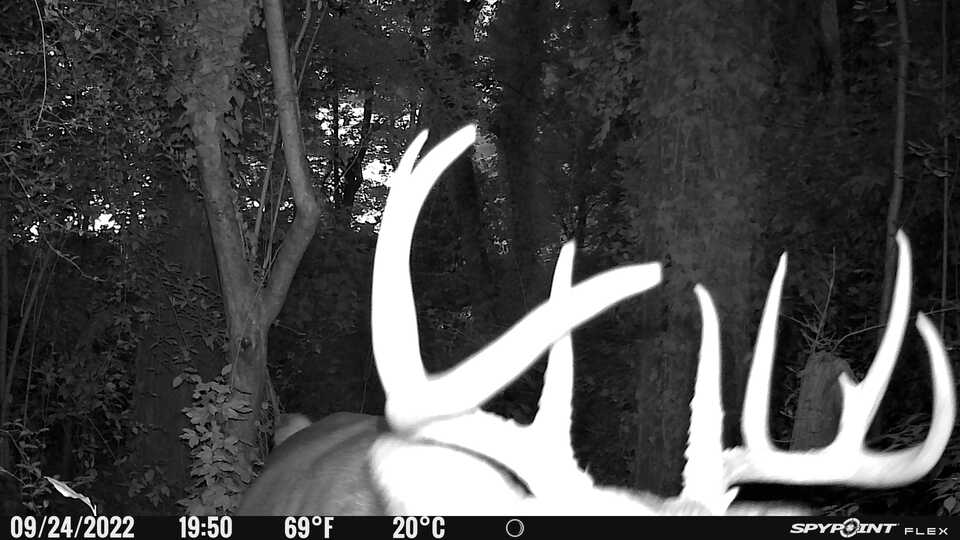
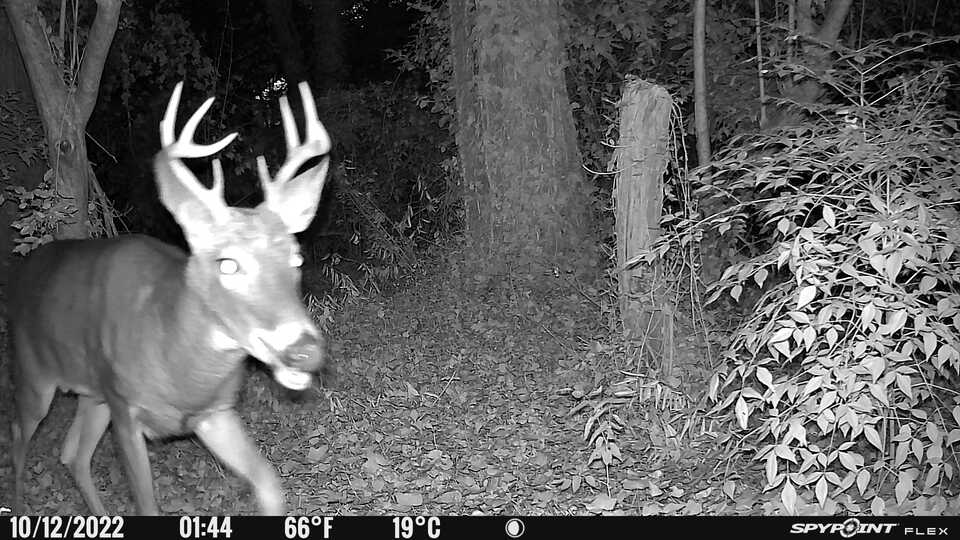
On the other hand, the camera quality is exceptional at the $120 price point. It has a 33 megapixel camera, and its images came out impressively clear, even when I zoomed in on antlers. Plus, the images saved on your SD card are HD, which is even better quality than what is transmitted to you via the cellular plan.
The cellular plans are pretty good too. I usually went with the 1000 photos for $10 a month plan. You can upgrade to unlimited photos for $15 per month. If you pay for an entire year, you can get a discount, but if you only use a camera three or four months a year I don’t see that being worth it. You can also get cellular discounts by being a part of the SpyPoint Insiders club.
Now there are a few different versions of the Flex camera. The Flex G-36 is this year’s flagship version, and it is largely the same as the original Flex, but with a 36 megapixel camera. The Flex S is an improved model that supports instant cellular transmission when it takes a picture, a solar panel, and rechargeable batteries.
The original Flex is discounted now that the new versions are out. You can pick up a camera and SD card bundle on Amazon for less than $100.
You can get the new and improved version, the Flex G-36 from Amazon for $119.99 with one day shipping or you can pick it up from Cabelas for the same price.
The upgraded Flex S comes with a solar panel and battery pack, so you expect it to cost a little more. You can pick it up on Amazon for $189.99 and Cabelas has the same deal if you want to use those reward points.
Currently, my plan for the season is to go with the cheaper Flex camera I already have, pick up another original Flex, and try out two of the newer G-36s. I have a few bucks I am trying to narrow in on, so I need to cast a wide net with my cameras. I plan on putting these cell cams in the spots that are closer to bedding so I don’t have to go in there as much. Leaving my regular cameras around the rest of the property.
Hunters will often call this finding a bucks “core area”, and if you are trying to figure out where your bucks core area is, I wrote a whole article about where to place the cameras, and the strategy behind it. Check it out here.
Setting Up Your SpyPoint Flex Camera
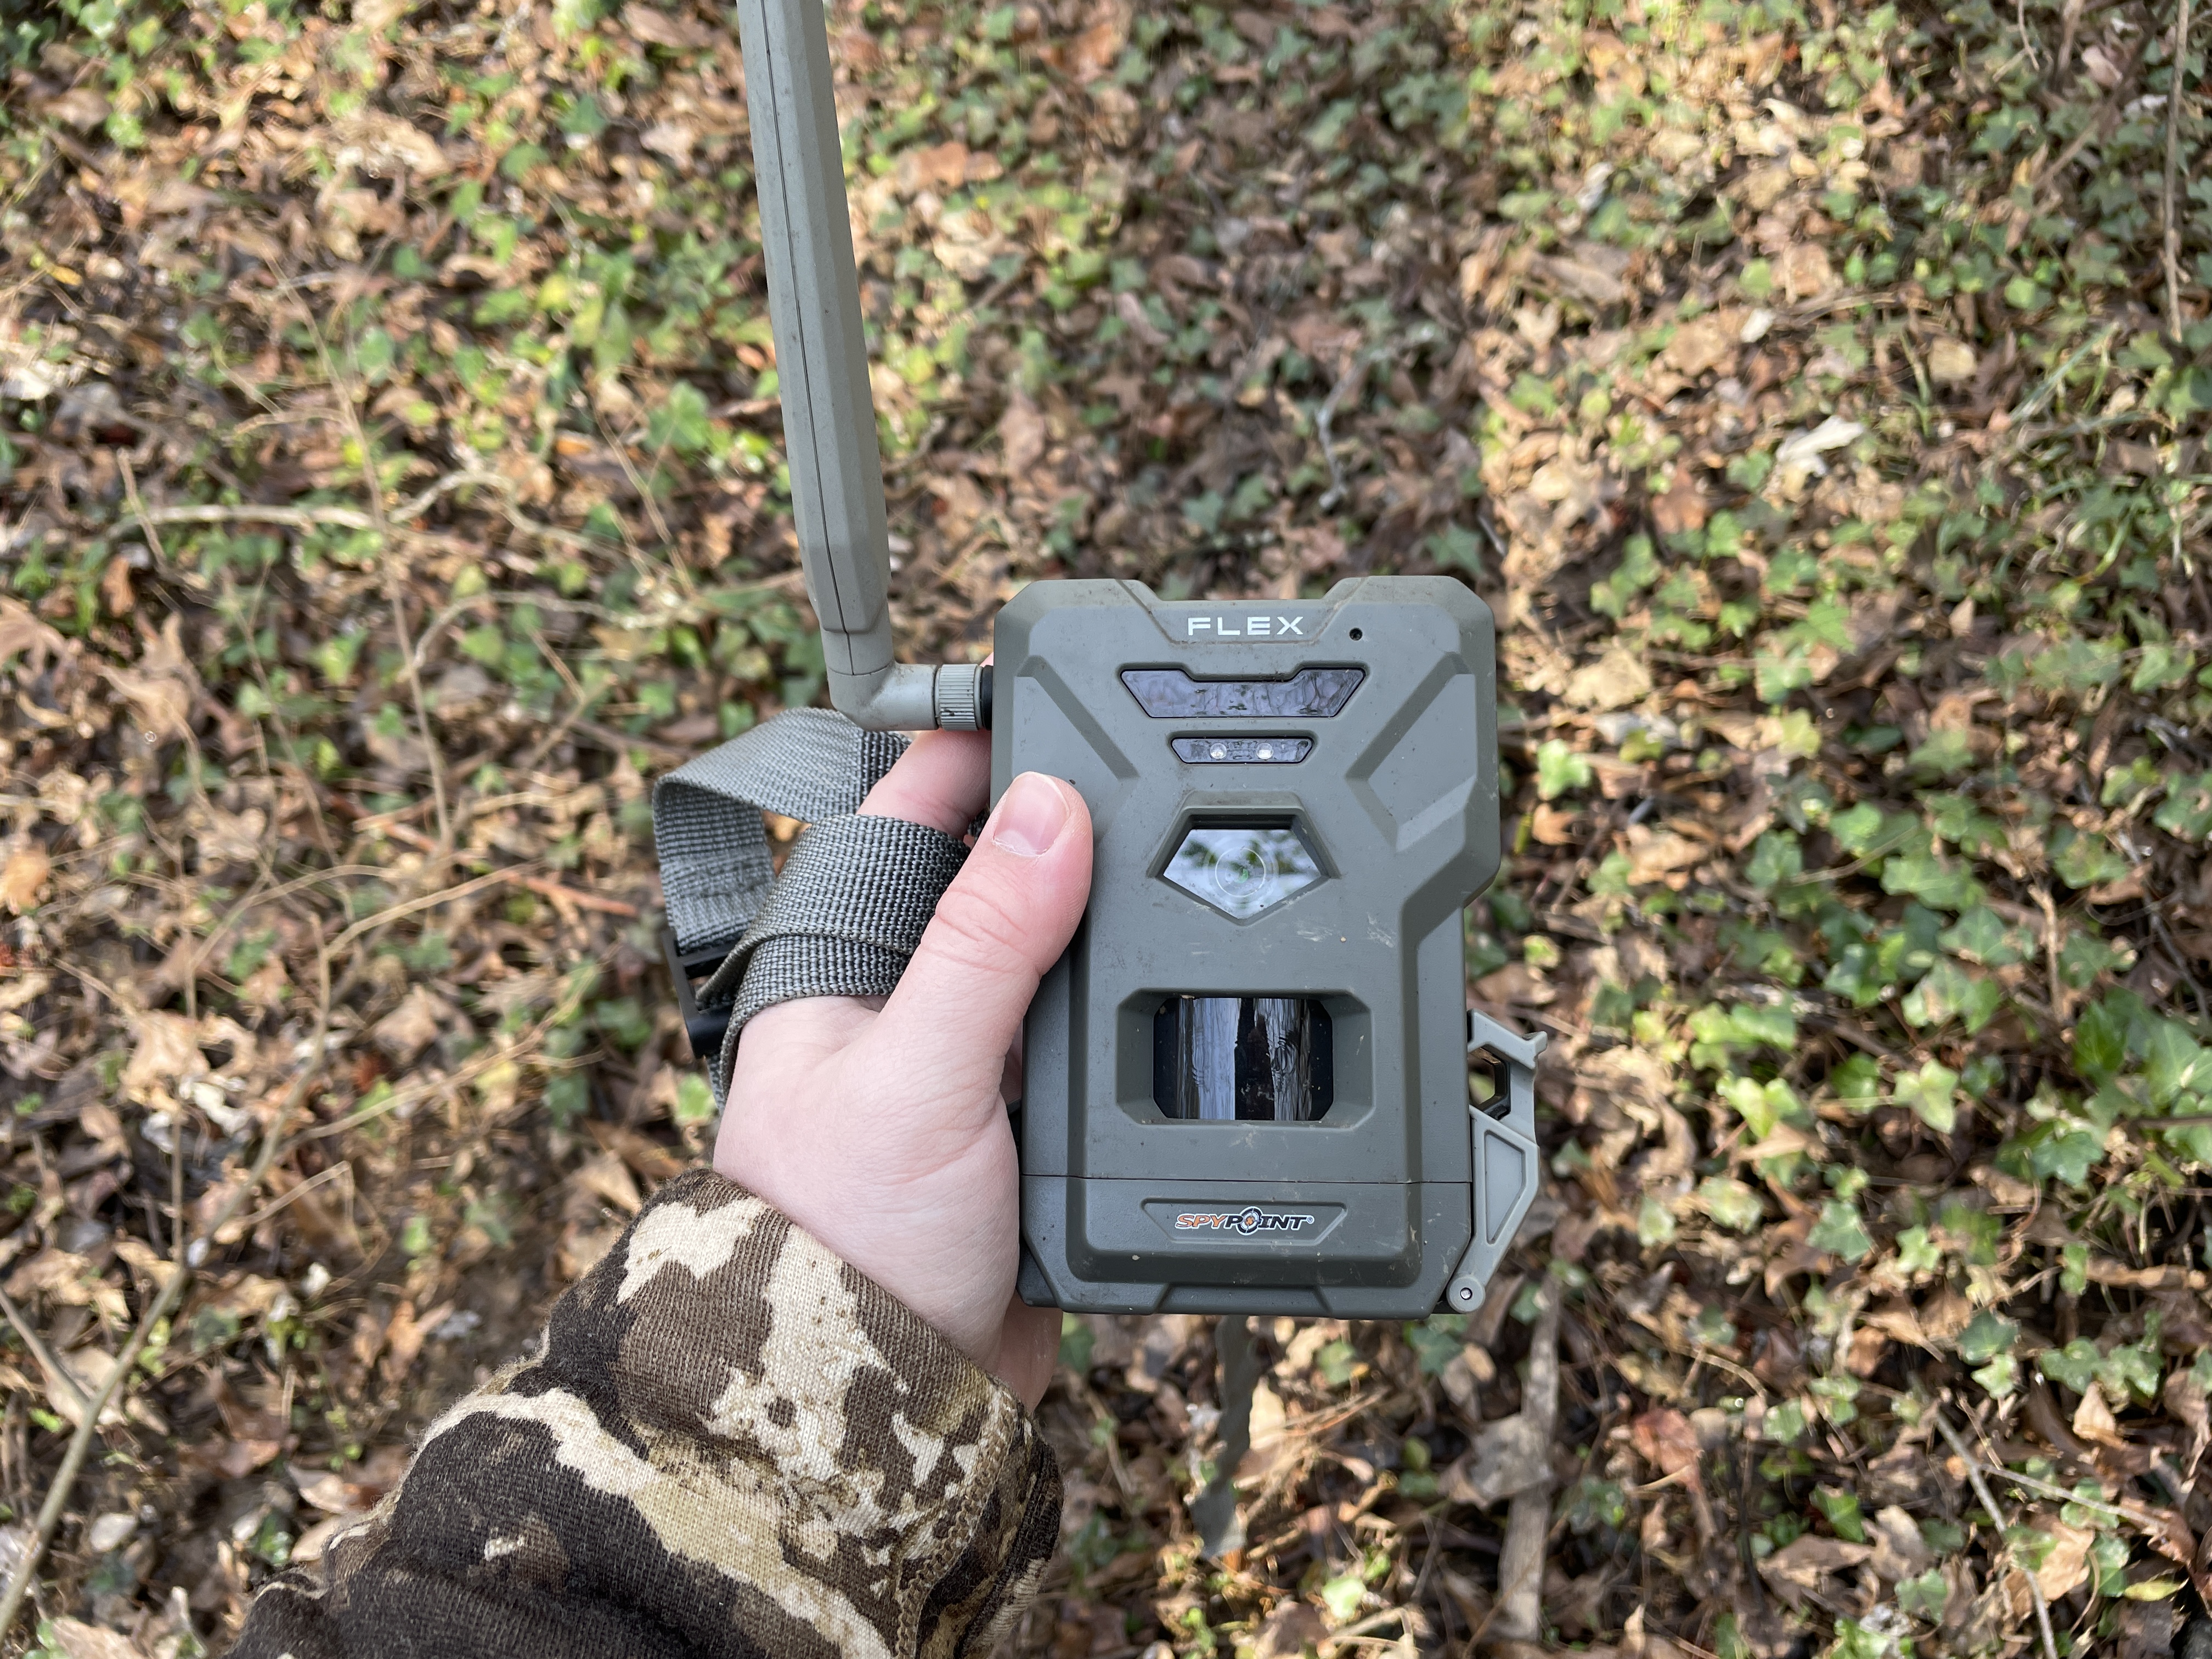
Spypoint really did make it easy to set this camera up. All you have to do is take it out of the box, screw on the antenna, add 8 AA batteries, a micro SD card, and your camera is good to go. In this state it will function like a regular trail camera that you would have to go and pull the SD card to see the pictures. No app or technology required, which some hunters may prefer.
To set up the cellular functionality, you start by downloading the Spypoint app and logging in. If you don’t already have a spypoint account, you have to create one first, but for some reason, you can’t do that on the app. So you have to go to spypoint.com and create an account. Thankfully, you can still do that on your phone. Create your account, and then go back to the app and sign in.
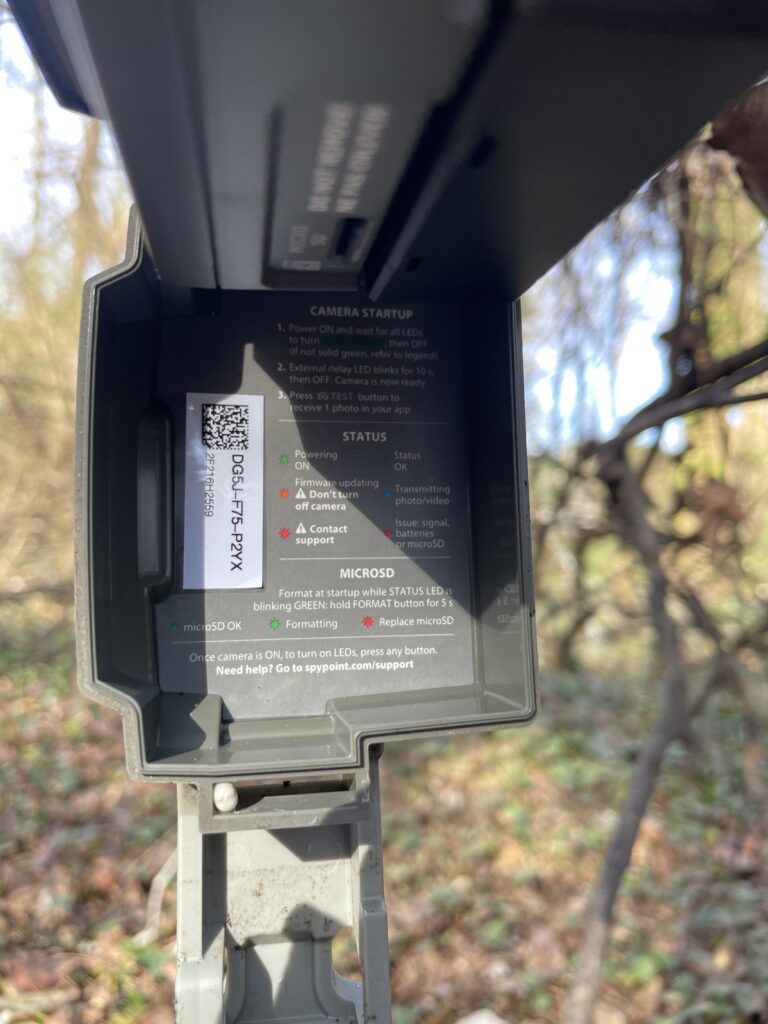
When you get the app pulled up, there will be a large orange button with a plus on it on the bottom right corner of the home page. Hit that to add a camera. Then, tell it which camera model you have. After that, you have the option of entering in the device’s activation code manually, or–and I really like this part–you can just scan the QR code on the inside of the camera, and the app handles all the setup for you. That made it super simple for me, and it doesn’t take too long to do.
As a side note, you need to make sure the camera has power during set up. When the app first connects with it, it will try doing firmware updates and all those other fun things. The camera needs power to do that. If you got lost along the way while setting up your camera, check out this video by SpyPoint that goes more in depth.
Choosing Your Cellular Plan
The next part is selecting which cellular plan you want to use. The best part about this camera, and most other new cellular cameras, is that you don’t have to buy an AT&T or Verizon camera. They work with both carriers, taking the stress of picking the right one out of the equation. Also, as a reminder for those new to cell cams, the camera’s cellular plan has absolutely nothing to do with your personal phone plan.
If you stop after setting up the camera like I laid out in the last section, you will still receive 100 free pictures per month without buying a plan! That is pretty neat, but let me tell you, that isn’t enough pictures and SpyPoint knows it. While these cameras are pretty good, not every picture has an animal in it. Plus, if you are using multi-shot like me, those 100 pictures don’t last the whole month.
SpyPoint has four plans for images, 100, 250, 1000, and an unlimited amount of images per month. Their prices aren’t too bad, but you can’t share plans between cameras. So every single camera needs its own plan, and you can’t just buy a single “unlimited” plan and hook it up to a dozen cameras, bummer. Here are the plan prices as SpyPoint has them on their website.
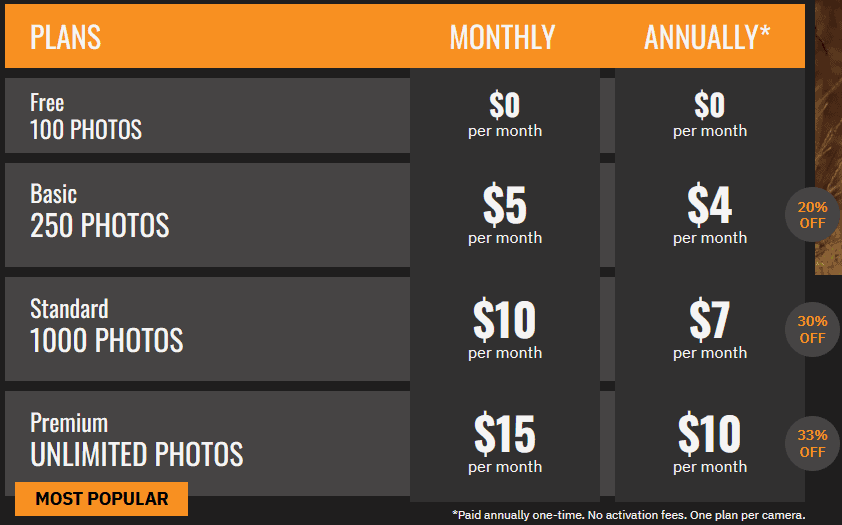
These are the regular images, which look just fine to me. However, if you want better images, you can pay for the Full HD image package. Although you will end up paying $5 per 50 images, you do get to see the standard image first before requesting the HD image, making those 50 images go a little farther.
If you like to use video, they are unfortunately not included in the regular plan. You have to pay for a certain number of videos before you can download them. Currently, you can get 20 videos for $5, but you do get a small preview before you choose to download a video. This way you don’t waste one of your 20 videos on a limb bouncing around. The catch to that, though is that it takes three regular images to get that preview.
The SpyPoint App & Camera Settings
Now that you have the camera setup and your cellular plan figured out, how is the app? It is important for these companies to make a good app to go along with their cameras, because that is the main way you are going to interface with the camera. There isn’t a whole lot you can do with the buttons on the camera itself, so to configure any settings, you need the app.
The app itself is pretty easy to use. It has 5 main tabs: your cameras, photos, maps, weather, and a help tab. Honestly, the map feature isn’t super helpful. You can see where your camera is because it has GPS, but unless it gets stolen and you need to track it down, I don’t see many hunters using the map feature.
The same can be said for the weather tab. I am not totally sure why it is even there, the app isn’t really a hunting app like OnX or Hunt Wise, it is just for cameras. The weather tab does have some good and concise information in it though, but I rather use the weather channel or a hunting app.

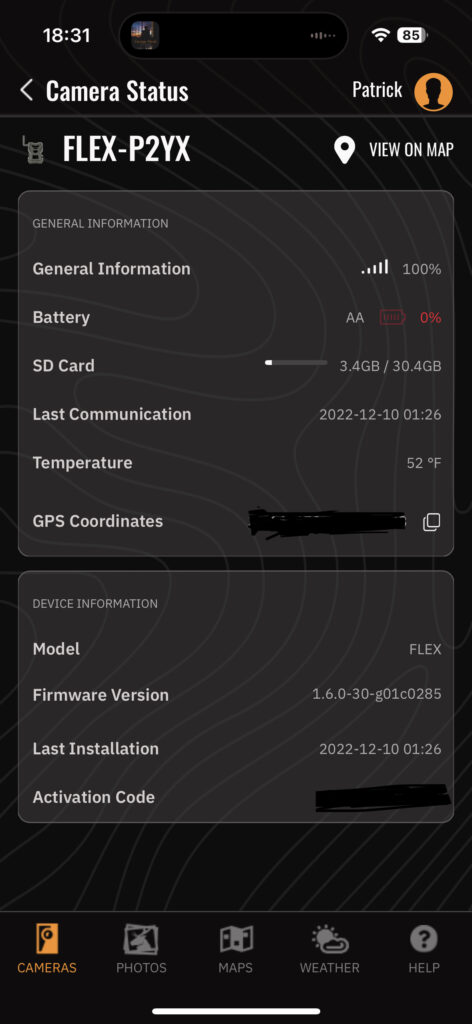
The two tabs we really care about are the cameras and the pictures. On the camera tab, you can tap on “status” under each of your individual cameras. This will tell you all kinds of good information like signal strength, battery life, GPS coordinates, and more. Check out this screenshot of my camera status.
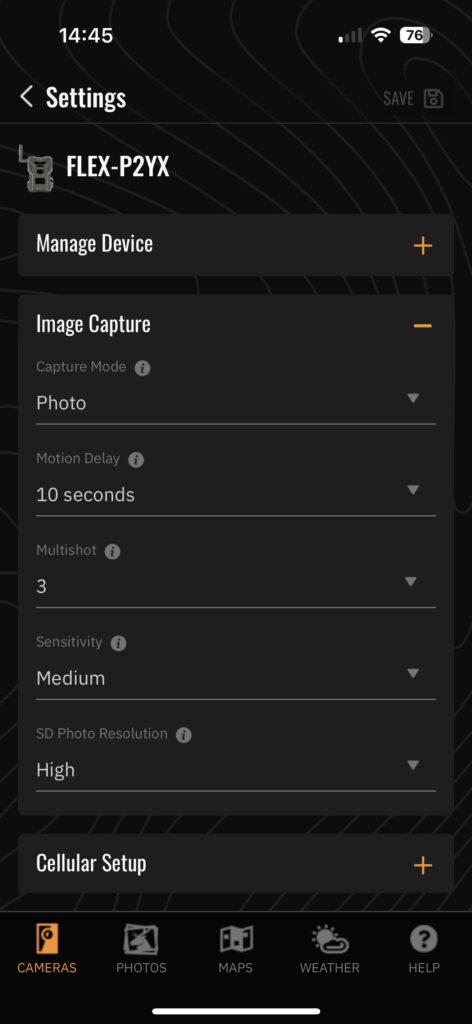
Back on the camera tab again, if you click “settings” under your camera instead of status, this is where you are going to change your camera modes, adjust cellular settings, and even do things like set your date and time. In general, you can change the capture mode from image, video, and time lapse; change the delay between captures, how many images it takes at a time (multi-shot), the sensitivity, and the image resolution. I am not going to go through every single setting here, but you can check out this screenshot to see all the options.
On the photos tab, you will be able to scroll through your recent photos. You can also see how many photos you have left on your plan, and choose to download videos if you have that camera setting on. You will find a few more tabs at the top that help you sort your images. The most impressive one is the “species” tag. This lets you group pictures of bucks, does, turkey, coyotes, moose, hogs, bears, and even people.
However, SpyPoint thinks this is as cool a feature as I do, so it is behind a paywall. To do much of anything on this tab besides scroll through all of your pictures in chronological order, you will have to pay to be a part of their SpyPoint Insiders Club, which I will cover in a bit.
Picture Storage
I wanted to say a word or two about picture storage too. So, all of these cameras have a SD card in them. Every picture or video they take will be saved there. That is great, we can leave a camera out all season and go get four months of pictures in one trip if we want to.
Although the images that they send you through the app do not stick around nearly as long. I was not able to get an exact time from the SpyPoint website, but I would say that images stay on the app for about a month or so. When I first figured this out, I freaked out a little thinking all of my images were gone except for the ones I had saved to my phone.
Thankfully, they are all saved on the SD card, you just have to go get it out of the camera. If your SD card fills up though, the camera will start overwriting images starting with the oldest one. Although with a 32 gb SD card, I would be impressed if you could fill it up.
As it turns out, if you are a part of the SpyPoint Insiders club, your images will stay on the app for a full 12 months, giving you plenty of time to do whatever you want with them.
The Only Time I Had an Issue
While this camera was awesome, there was one time where I had an issue. I was looking at my pictures and noticed that my camera said it needed a firmware update. So of course, I hit the update button and let the camera do its thing for a while. Well, overnight, the camera took a thousand pictures of nothing and used up all of my images for the month.
I was immediately disappointed, because I had heard of people having a hard time with spypoint support before. Although I am happy to say that support helped me extremely quickly. Our entire phone call lasted 5 minutes! They ended up restarting my picture counter for the month, pushing the old firmware back onto the camera so that it worked properly, and even gave me a $15 coupon towards next month’s subscription.
I am sure this was an isolated incident that was the result of some small bug in the update, but my point is that if you have problems, the support team is very helpful in my experience. The only negative was the fact that taking all of those pictures did a number on my camera’s batteries, and I had to go replace them a few days later.
The SpyPoint Insiders Club
I have mentioned the Insiders club a few times today, and I just wanted to sum up what it is for you. To be frank, I never ended up purchasing it. I didn’t feel like the cost was quite worth it when I just had one camera, but it comes with a few good benefits that some hunters might want to use this season. It costs $100 a year, and there is no monthly option. Here is a quick list of what you get:
- 250 Free photos per month per camera (instead of 100)
- 12 month photo history (instead of 1 month)
- Access to species tracker on the photos tab
- Ability to favorite 500 photos for easy access
- 50 free HD photos per month per camera
- Save 20% on cellular plans
- Other perks like giveaways, free shipping, dedicated customer support, and pre-sales.

Honestly, I feel like this is a pretty good deal if you are running a lot of cameras. The 20% savings can add up when you have a half dozen cameras or so. The rest of the features are nice to have too, especially the species tracker. Although, if you only have a camera or two in the woods this year, I’m not sure it’s worth it.
Would I Buy It Again?
All things considered, I would buy the SpyPoint Flex a few times over again. I actually plan on using a few more this year, as I mentioned previously. They are solid trail cams with a high-quality camera, and the newest model costs around $120, where many trail cameras that it competes with are well over $200. The app is easy to use, and it makes the cameras easy to set up and check in on. I don’t like that you need a cell plan for every camera, but at least the plans are not too expensive.
If you need a new trail camera or two before the season starts to ramp up, I would seriously consider going with the SpyPoint Flex G-36.
Sister Post | How to Find a Bucks Core Area
A sister post is another post that I have written that follows along with the same topic as the one you just read. After reading this article, you will probably like this next one even more! Here is a little teaser…
If you are lucky enough to get a trail camera picture or two of a nice-looking buck during the preseason, you are probably trying to work out the best way to hunt him. One of the best ways to track down a specific buck is to locate his core area…Keep Reading
What Is a Core Area?
We have all heard of a bucks home range. A bucks home range is typically the size of…Keep Reading
Don’t Run Him Off
If you know you have a nice buck in the area and want to start narrowing down his core area and patterns, you need to be careful not to run him off. You will need to do a lot of…Keep Reading
Thank you for reading my article! I hope you enjoyed it, and if you have any questions or feedback, please send me an email at Patrick.Long@omegaoutdoors.net. If you want to learn more about me or Omega Outdoors, visit my About Page. Otherwise, I hope you have a great day, and check out some of my other articles while you’re here!