I absolutely hate the word “gamey”. If someone says they do not like wild meat because it tastes “gamey” then they had it from someone who does not know how to prepare it properly. The truth is, venison can taste gamey if you do not take care of it the right way. There are only a few very important steps to making your wild game taste amazing. If all of these steps are done right, then your deer meat will look and taste the exact same as very lean beef. Many factors can affect the way wild meat tastes. So why does deer meat taste gamey? To answer this question, I will go over my process for taking care of venison from start to finish.

The only reason wild meat tastes “gamey” is because it was not processed properly. The key to making deer meat taste great is to select the right animal, choose the correct shot placement, retrieve the animal in a timely manner, dress and clean the animal correctly, and butcher it correctly. If you can do all of these steps, your venison will taste much better than anything you have ever bought from a store.
Before the Shot
Deer Selection
Deer meat is going to taste a little different depending on the age of the deer. Old mature bucks with giant antlers are every hunter’s dream, but they are made of old, tough meat. On the other hand, fawns and up to about two and a half-year-old deer are nice and tender and make for great eating. This does not mean that you should not eat old bucks that you harvest, it just means that you should probably process and cook them a little differently. If you are hunting for a deer just to fill the freezer, take a younger doe because they will taste the best in terms of tenderness.
Shot Placement
Another thing to think about if you are just harvesting a deer to eat is shot placement. If you make a good clean shot on a deer they will go down quickly and you will not ruin any meat. Now a lot of people will choose to make a neck or headshot on deer to not ruin meat, but personally I do not like to shoot them there.
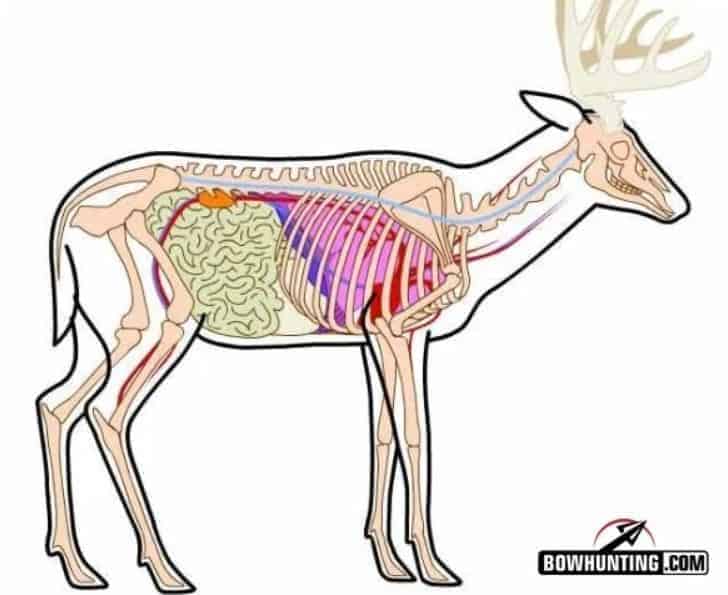
Headshots get especially messy and brains smell terrible. So, I choose to shoot my deer right behind the front shoulder looking for a heart or lung shot. Although more than once I have hit the shoulder and with my .308 Remington 700, which totally ruined it. Although this is a chance I am personally willing to take.
Whichever of those three places you choose to shoot your deer, it does not really matter and is up to your preference. However, the one place you absolutely want to avoid hitting a deer is the digestive system (AKA a gut-shot). No matter how fast you can get that deer cleaned and on ice, all that bile and other acids will soak into your meat and will make it taste gamey.

After the shot
There are a few key steps you need to take after the shot so that your deer does not ruin. Things like how long you take to retrieve a deer, and how you field dress them are all extremely important. So much so that these two steps are probably the most important in the entire process.
Retrieval
One of the most important steps of this process is retrieving your deer. If you are really worried about making your meat taste good, you may be super eager to go get your deer as soon as possible. Although you should ALWAYS give your deer plenty of time to die. Whitetail, like any other animal, can be very dangerous if they are wounded. If I feel like I made a good shot I will give the animal at least thirty minutes to die. Even if it fell where I shot it. Safety is always the first priority.
A wounded animal will eventually die and you can track it then. Although if you make a bad shot and have to leave your deer overnight, and you will definitely be able to tell when you taste it. With that being said, safety is a priority so do not be afraid to pull out. Not only does this give them time to die, but it also keeps you from jumping said wounded deer. If you do jump them, that will make tracking and retrieval much harder the next day.
Although if you made a good shot and waited thirty minutes, you should go retrieve your deer sooner rather than later. Waiting a few hours will alter the taste, especially if it is hot out. Where/when it is a bit colder, you can afford to wait a little longer but I would suggest going to get it no longer than forty-five minutes to an hour after the shot.
Field Care
Once you have found your deer, you can start the process of field care. There are a few different situations to think about here. Either you can skin the deer on that property, or you need to load the deer up and take it home to skin it. If you can skin the deer there, after you find it, remove the tarsal glands and testicles and get it over to the area you will skin it at.
A lot of people will skip the tarsal glands, but I always remove them first thing. I believe it keeps all that urine and hormones out of the meat. Plus if you keep them and throw them around your stand the next morning, it’s a free attractant.
I remove the testicles just to make sure that no other hormones are going into the bloodstream or getting into the meat. Whether or not this has any effect, it is easy to do and takes only a few seconds. Some states require proof of sex attached to the deer, mine does not. Although I would think a penis would be sufficient, it does not hurt to check your local DNR.
If you need to transport your deer farther away, you should field dress it when you find it. It is important that you do not puncture the organs when you are doing this. For the same reason you do not want to gut shot a deer, you do not want to open up the stomach while it is in the animal, or puncture the bladder. The more of those acids that get on your meat, the more gamey it will taste.
Here is a great example from Meat Eater of how to field dress a deer:
Cleaning/Skinning Your Deer
When you do get to your skinning location, the first thing you do is hang your deer up either by the neck or by the feet. I hang mine from the feet with a hanger going under each achilles tendon. There are plenty of methods for skinning a deer so do it how you like, but there are a few things you should do to make sure your meat is the best it can be. First, you should always cut with the blade pointing away from the meat, this way the hair does not get all over it and keeps your meat clean. Secondly, make sure you do not puncture any organs or the bladder, you do not want that on your meat.
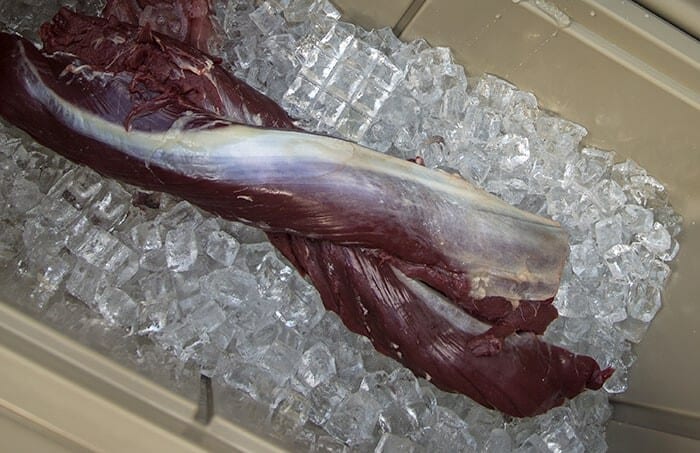
You should also not take too long to skin it. It does not have to be perfect but what is important is that after you get your deer cut up the way you want it, put it on ice in a cooler. I normally put a bag of ice down on the bottom of the cooler and then two of the quarters on top of that, another bag of ice on that, then the rest of the deer, followed by another bag or two of ice. This may sound like an obvious step but you would be surprised.

True story, one year I was hunting in Kentucky with my father, and we had just gotten back to the hotel after we had gone to eat dinner to celebrate the deer I had shot earlier in the day. When we got out of the truck some fellow hunters had also killed a deer. Although they had their deer quarters packed up in plastic bags in the bed of their truck and they were going to drive a few hours back home the next day. They talked about how they were worried that the meat would go bad so we asked “why don’t you put it on ice in a cooler?”. The thought had honestly never crossed their minds. The next morning when we left the hotel, we saw a cooler in the bed of their truck instead of plastic trash bags.
Aging Your Meat
Now, after you have your deer cleaned, quartered, and on ice, it’s time to head home. You need to leave your deer in the cooler for an extended period of time. Make sure the cooler drain plug open and the cooler on an incline. The drain plug should be on the lower side of the incline. What this does is allow enzymes naturally present in the meat to break down the muscle tissue. It also allows excess blood to be drawn out of the venison and run out the bottom of the cooler. These two things result in overall improved texture and flavor. I have seen different people say that you should age your venison from anywhere between 3 and 14 days. Personally, I age mine for 7 days. Check on the cooler now and then, especially if it is hot out. You may have to add more ice.
Butchering
DIY Butchering
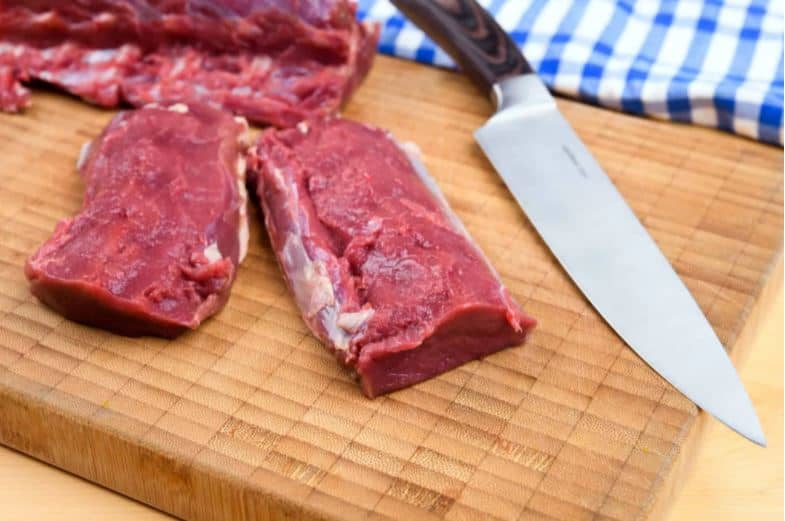
However you choose to cut up your meat, you just need to remember that you should be removing sinew, membranes, and other connective tissues. These things hold muscle groups together. You will easily be able to peel apart most of the quarters if you follow these muscle groups. Making sure you remove these unwanted tissues will keep their bad tastes out of your finished product. When you are done, you should have red meat, not red and white or purple. Basically, if it does not look like you would want to eat it, cut it off.
You also want to get rid of most of the fat. Unlike beef fat, deer fat is not good. It has a very bitter taste and is better off not in your finished product. If you are making something that requires fat, like hamburger, add in pork or beef fat. The ratio is about 1 pound of fat for every 4 pounds of venison.
After you have it all cut up, you need to store it correctly. At my house, we mostly make cubed steak out of our quarters. We get enough pieces to make a meal for the family and put it in a vacuum-sealed freezer bag. That way when we want to eat it we just have to thaw one bag and we can eat it in one night. If you do not store the meat correctly or accidentally allow it to get freezer burn, you will be able to tell when you do start cooking it.
The Quality Deer Management Association made a nice video about DIY Butchering that you can see here:
Using a Professional Meat Processor
Processors vary all over the country, some are great and some are downright scary. Make sure that whichever processor you choose in your area is a licensed processor. The first time you go, check out how they do things. If they will not show you, that’s probably a bad sign. If they want to weigh your deer and then give you an equal weight of other meat that is already processed, leave. All the work we talked about before will be wasted and you could wind up with someone else’s deer that was gut shot and left in the sun for a day.
Once you do find a couple of good processors, check out how they price things. Some do it by the deer others by the pound. Generally, you can expect to spend between $75 to $125 to get your deer processed. Personally I like to save my $100 and know that I did the entire process from field to table. However, if you are a busy person or just do not want to be bothered with the butchering, processors are great. And if you would like to donate the deer, a lot of processors can help you there as well. Either by taking it themselves or telling you where to go.
Conclusion
To wrap it all up, you just need to follow these not-so-simple steps. After you have picked a deer, make a good clean shot. Then retrieve it in a timely manner (30-60 minutes), skin and clean the deer and get it on ice. Then you need to age your meat for around 7 days. After that, butcher it or get it processed by a professional. Deer hunting is a lot of work. So if you are willing to put in the work to harvest a deer, you need to be willing to put in the work required to make sure that you process it correctly. When people try to take short cuts or be lazy with their processing, their venison tastes terrible. Do this process with lub (love), the more you care about it the better it will be.
Thank you for reading my article about why deer meat tastes gamey. I hope you enjoyed it and learned something you didn’t already know. If you like my content, subscribe to my weekly update. If you have any other questions about why your deer meat tastes gamey or just want to connect, feel free to email me at Patrick.Long@omegaoutdoors.net.
